How to Add Custom Tokens
Last updated: 01/14/2026 09:23:00
If your assets have been successfully transferred to your wallet but do not appear on the My Assets page, the token may not be enabled by default. In this case, you can manually add the token by using one of the methods below.
Before You Start
Make sure you have the following information:
- The correct blockchain network
- The token’s contract address You can usually find the contract address from the project’s official website or a trusted block explorer.
Method 1: Add a Token by Searching the Contract Address
- Open KuCoin Web3 Wallet and go to the wallet homepage.
- Then click the Manage Tokens icon on the right.
- Enter the token’s contract address in the search bar.
- Locate the token in the search results.
- Click the “+” icon to add the token to your assets list.

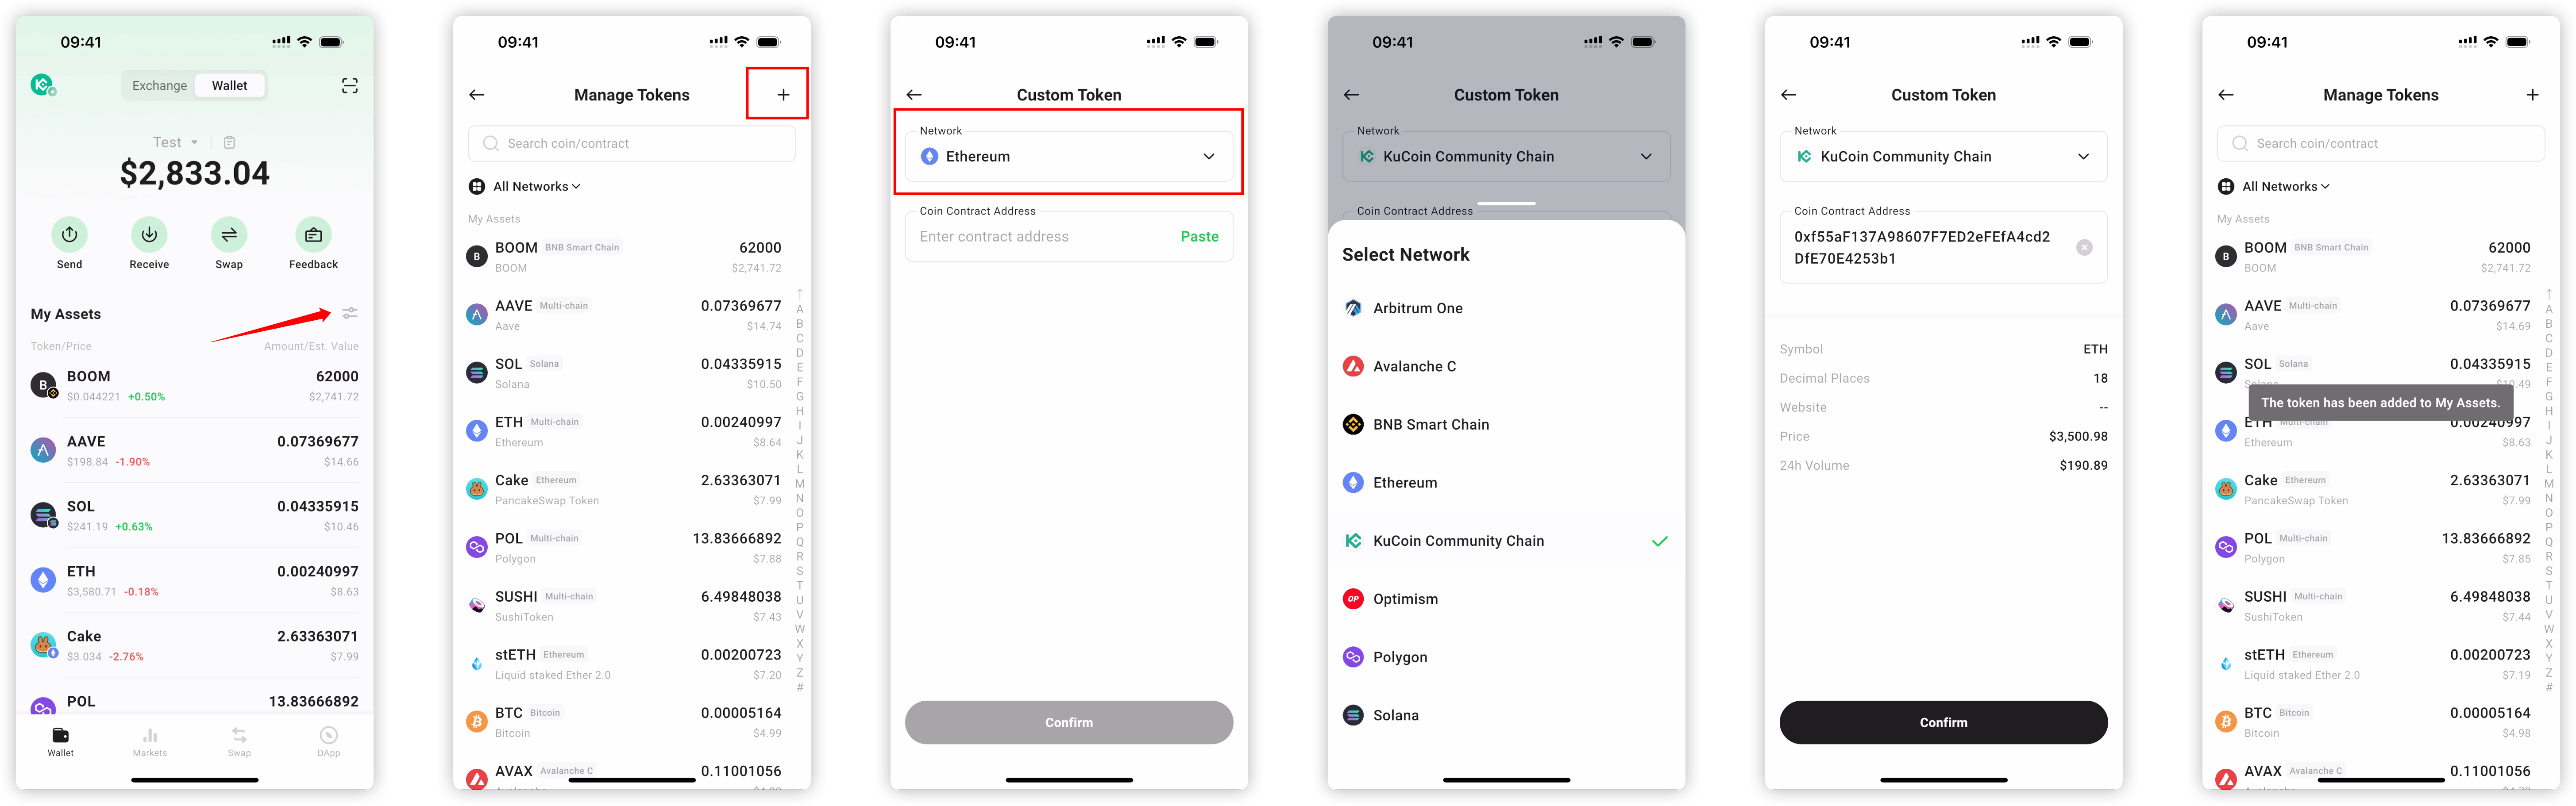
Method 2: Add a Token Manually
- Open KuCoin Web3 Wallet and go to the wallet homepage.
- Then click the Manage Tokens icon on the right.
- Click the “+” icon in the top-right corner.
- Select the blockchain network where the token is deployed.
- Enter the token’s contract address.
- Click Confirm.
Important Notes
- Always verify the contract address before adding a custom token.
- Adding a token only affects how it is displayed in your wallet and does not initiate any on-chain transaction.
- If the wrong network or contract address is used, the token balance may not display correctly.
About KuCoin Web3 Wallet:
🔗 X (Twitter)
🔗 Telegram Group
🔗 Telegram Channel
🔗 Get KuCoin Web3 wallet
🔗 X (Twitter)
🔗 Telegram Group
🔗 Telegram Channel
🔗 Get KuCoin Web3 wallet